
The
Tongue and Quill
Templates
User’s Guide
How to use the Official
AFH 33-337 Templates
DECEMBER 8, 2020
DEPARTMENT OF THE AIR FORCE
https://www.e-publishing.af.mil/

1
TONGUE AND QUILL TEMPLATES USER’S GUIDE
AFH 33-337, Tongue and Quill, provides the formatting standards and guidelines for several types of
official Air Force documents as derived from AFMAN 33-326, Preparing Official Communications. While
the Tongue and Quill has historically had visual examples of document formatting for users to follow,
actually replicating those standards was left as an exercise for the user. In order to reduce duplication
of effort across the Air Force, Microsoft Word templates for the most common Air Force document
formats are now available through e-Publishing and preloaded into Air Force computers with the AF
Standard Desktop Configuration for:
Official Memorandum
Official Biography
Personal Letter
Talking Paper
Point Paper
Bullet Background Paper
Background Paper
Position Paper
These templates provide the basic formatting rules and technical setup – margins, font size, page layout,
and so on – which should save users time and effort in finding a “good” template to work from or,
worse, building a document from scratch. This User Guide provides instructions on the best way to use
these templates, as well as instructions on modifying them for more specific use needs.
Note: These templates provide the basic, catch-all formatting rules for their document types. They should
not be used in replacement of the Tongue and Quill, as they do not include full detail on all formatting
rules, optional styles, or conditional cases. Additionally, check to see if your command supplements
AFMAN 33-326, or if there are operating instructions or local guidance on document standards.
Using the Templates
The official templates are provided as Microsoft Word Template files (“.DOTX”). Whenever you open a
template file, rather than opening the template itself, you will create a new “Document 1” based on the
template’s content and formatting. In this way, you don’t need to worry about accidentally modifying or
overwriting the template – though doing so intentionally is possible, and the steps for doing so are
described in a later section. Once you have created a new document from the template, adding content
is as simple as replacing the placeholder text with your own – formatting such as margins, spacing,
indents, and the like are all handled automatically through the templates’ built-in rules and styles.
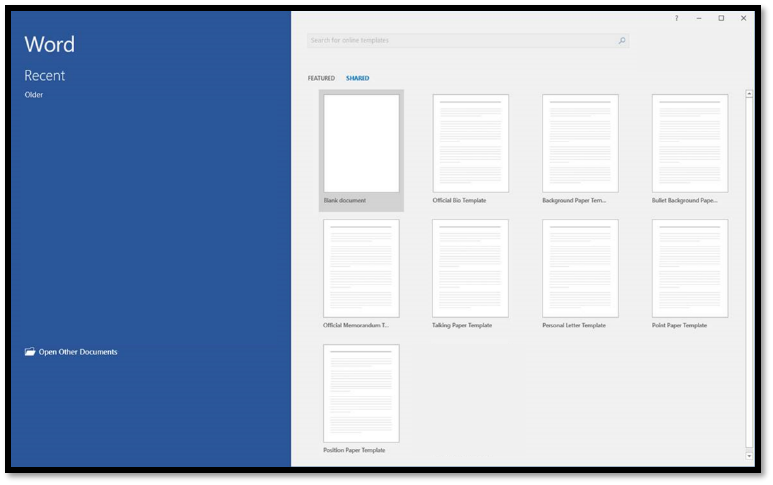
Where to Find the Templates
The templates are available in two places: on Air Force E-Publishing, and preloaded into Air Force
computers with the AF Standard Desktop Configuration.
On Air Force E-Publishing (https://www.e-publishing.af.mil), go to the home page and click on “Items of
Interest.” Click to download the template you need and save it somewhere on your local computer.
Then, just double-click on the template file to open a new document based on that template. Note E-
2
Publishing does not require a CAC to access. This method works on any computer with Microsoft Word
2013 or later installed, not just Air Force computers.
The templates are also built into Microsoft Word on Air Force computers with the AF Standard Desktop
Configuration. When opening up MS Word, or by accessing the File New menu, you will be presented
with a grid of template options. Find whichever template matches the document you are preparing, and
click to create a new document.
Microsoft Word Styles
The formatting of the templates is primarily controlled through the use of Microsoft Word’s “Styles”
feature – the series of named boxes at the top of the program that display text with different
formatting. These Styles are a powerful tool that allows for specific formatting rules to be applied to
certain categories of text. While Word typically has dozens of styles available to use, in the templates
the only styles available are those required for the document being written.
The names of each style are self-explanatory. For example, in the Official Memorandum template, the
“MEMO FOR” style is used for the “Memorandum For” element, the “Body” style is used for body
paragraphs, and the “Signature” element is used for the signature block. The “Normal” style is used for
certain elements that do not have specific formatting rules, or for formatting elements not covered by
the template itself. Diverting from the default styles should be done sparingly!
Using Tab Stops
A number of features in the templates rely on the use of the “Tab” character to ensure proper
alignment, paragraph numbering, and spacing. By default, hitting Tab will normally move the cursor to
the next multiple of 0.5”; in the templates, certain elements have been modified to cause the tab to
stop at more useful pre-determined points.
3
Using Tab for Paragraph Numbering
The “Body” style in the templates is used for the main content of each paper and provides automatic
numbering or bulleting. They are functionally the same as Word’s built-in numbered lists or bulleted
lists that you are likely familiar with. To create a sub-paragraph or sub-bullet, simply hit Tab at the start
of a new line in the “Body” style, and the cursor will move over and change to the appropriate
paragraph heading. To move a paragraph back to the left, press “Shift + Tab” at the start of the
paragraph.
Using Tab for Alignment
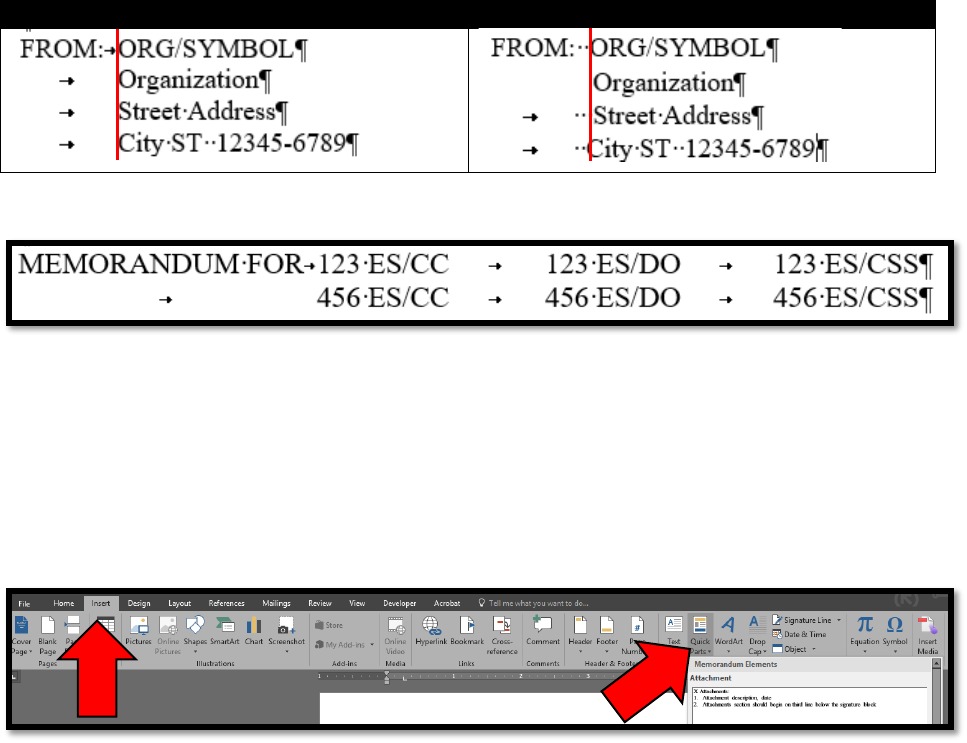
In the Official Memorandum in particular, the “Memo For” and “From” elements are supposed to have
elements on different lines aligned with each other. The “Memo For” element in particular might
include multiple entries on the same line, if the recipient offices are short in length. Proper alignment is
accomplished through Tab Stops – this includes the first line, which has a tab stop aligned at the same
distance as “two spaces” from the “FROM:” header.
With Tab Stops
Without Tab Stops
The same is true for the “Memo For” element:
Using Quick Parts
“Quick Parts” is a tool within MS Word that allows you to insert predefined objects into a document.
Within the Official Memorandum template are a number of Quick Parts that provide boilerplate for a
number of Memorandum elements that may be optional or replicated.
To insert a quick part, go to the “Insert” menu, and on the far right select “Quick Parts.” From there, if
you click on any of the parts, it will insert directly at your cursor’s present position.
4
Modifying the Templates
The templates provide the baseline standard for formatting and content layout expected for Air Force
official documents. However, formatting standards may be modified by supplements to AFMAN 33-326,
or there may be need for customized templates specific to a unit or use case. For example, rather than
having users manually enter a unit’s letterhead on every document, it is possible to modify the AF
template and create a unit-specific template that has the letterhead pre-filled, thereby saving more time
for users down the road. Alternatively, a unit may be interested in having a template for the Trip Report
memorandum type specifically, and wants to modify the body of the template to have the standard trip
report headings and elements described in the Chapter 14 example.
Modification of the templates is possible and encouraged, as it enables users to tailor the templates to
their specific needs while taking advantage of the formatting standards the templates provide. Units
that modify the templates should take care to ensure that their custom templates remain within
standards and stay up-to-date with the version of the templates provided by Air Force E-Publishing.
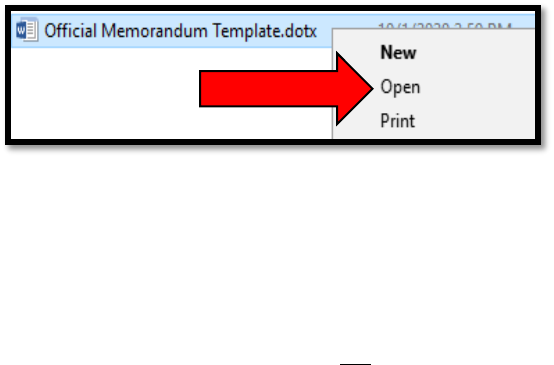
Creating a custom template is as simple as the following:
Download one of the Official Templates from Air Force E-Publishing
Right-click the file
Select “Open” instead of “New”
This will open up the template file itself, rather than creating new “Document 1”. Any changes made to
the template at this point will save to the template itself, and documents made from it in the future will
reflect these changes. We recommend that custom templates use “File Save As” to distinguish
themselves as new templates, with a naming convention describing their origin, function, and currency,
such as “123 FW Memorandum Template YYYYMMDD”.
Make sure that your new template is saved as a .DOTX file, not a .DOCX file; otherwise, your template
may be subject to accidental changes or overwrites.
Changing Template Content
While the templates provide the default formatting settings you will need to produce official Air Force
documents, they do not provide instruction on the content of those documents, due to the wide variety
of ways they can be produced. A Trip Report and a Memorandum for Record share the same formatting
rules, but their actual content is significantly different, and you may want to create ready-built
templates for these document types that adhere to local guidance or preference. To do so, simply write
the document as normal, and then save as a new template.
5
Changing the Header
The most common modification users will make to the template is changing the letterhead to their
unit’s authorized letterhead. To accomplish this, edit the template, and then double-click in the header
area. Then, overwrite the placeholder text as appropriate to your unit according to AFMAN 33-326.
Take care to distinguish between the first line and the second lines onwards, as the first line has slightly
different formatting.
Selecting New Headers
When preparing a document with For Official Use Only (FOUO), Controlled Unclassified Information
(CUI), or classified information, you are required to use classification markings IAW DoDM 5200.01 Vol 2,
Marking of Information. The templates come with premade header and footer quick parts that provide
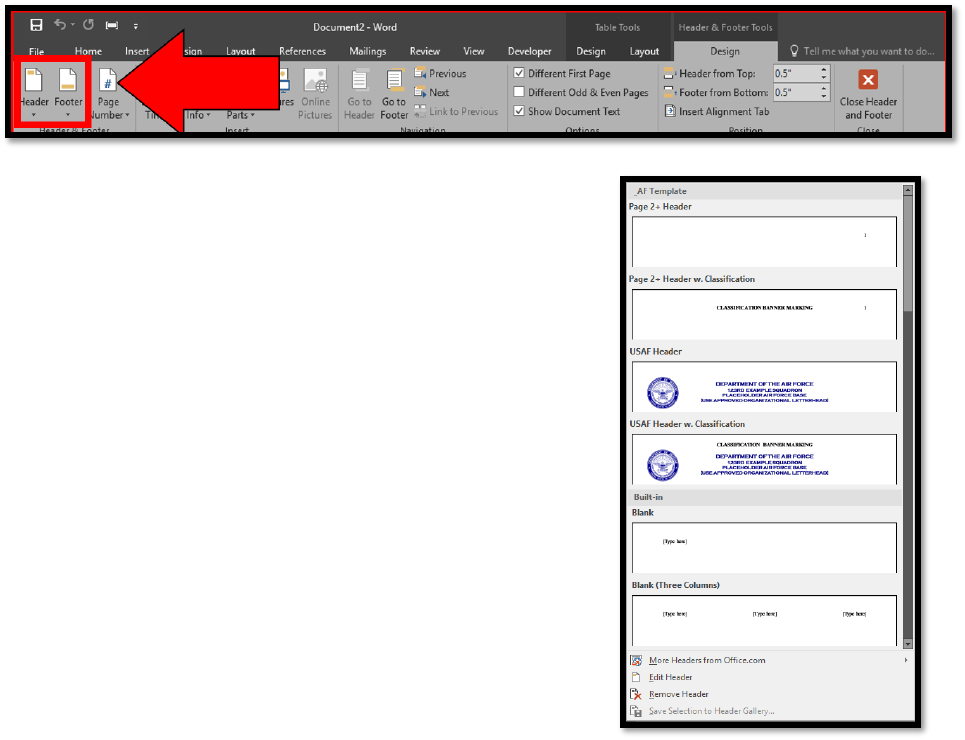
formatting for classification banner markings. After double-clicking the header or footer, in the top left
there are dropdown menus for the Header and Footer, similar to the Quick Parts menu.
Select the header which matches your intended use; for AF papers
without letterhead, this may be the “Page 2+” header with or
without classification. Take note that the first page of each
template is formatted differently from all other pages, which
means that the header and footer will need to be applied once on
the first page, and then again on the second page. Remember to
apply the header and footer elements for each page, especially
when preparing FOUO, CUI, or classified documents.
The “USAF Header” provides official letterhead formatting,
however official letterhead is not required for all paper types.
Rather, it is made available for circumstances where local
guidance or user preference might warrant the inclusion of a
letterhead on a document.
Note: The “Page 1 Footer w. Classification” option by includes a
classification authority block. The classification authority block is
not required for unclassified, FOUO, CUI documents, and so the
“Page 2 Footer w. Classification” should be used instead.
6
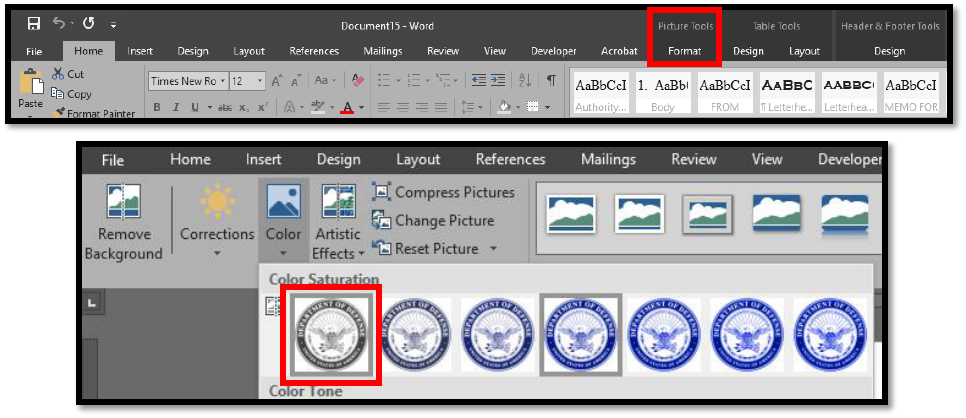
Changing the Letterhead Color
AFMAN 33-326, Preparing Official Communications, states that official AF letterhead may use blue or
black ink; the AF templates as provided default to blue coloration, but you may prefer a change to black
for some purpose. Changing the color of the letterhead text is no different than changing the color of
text anywhere else, but changing the color of the seal requires the following steps:
1. Click on the seal to select it
2. In the ribbon, click on “Picture Tools: Format”
3. On the left side, select the “Color” dropdown menu
4. Select “Color Saturation 0%”
